Organizing with labels
Labels let you categorize your snippets by purpose and assist in retrieving them later on. Assign nested, color-coded labels to your snippets to maximize productivity.
Creating a label

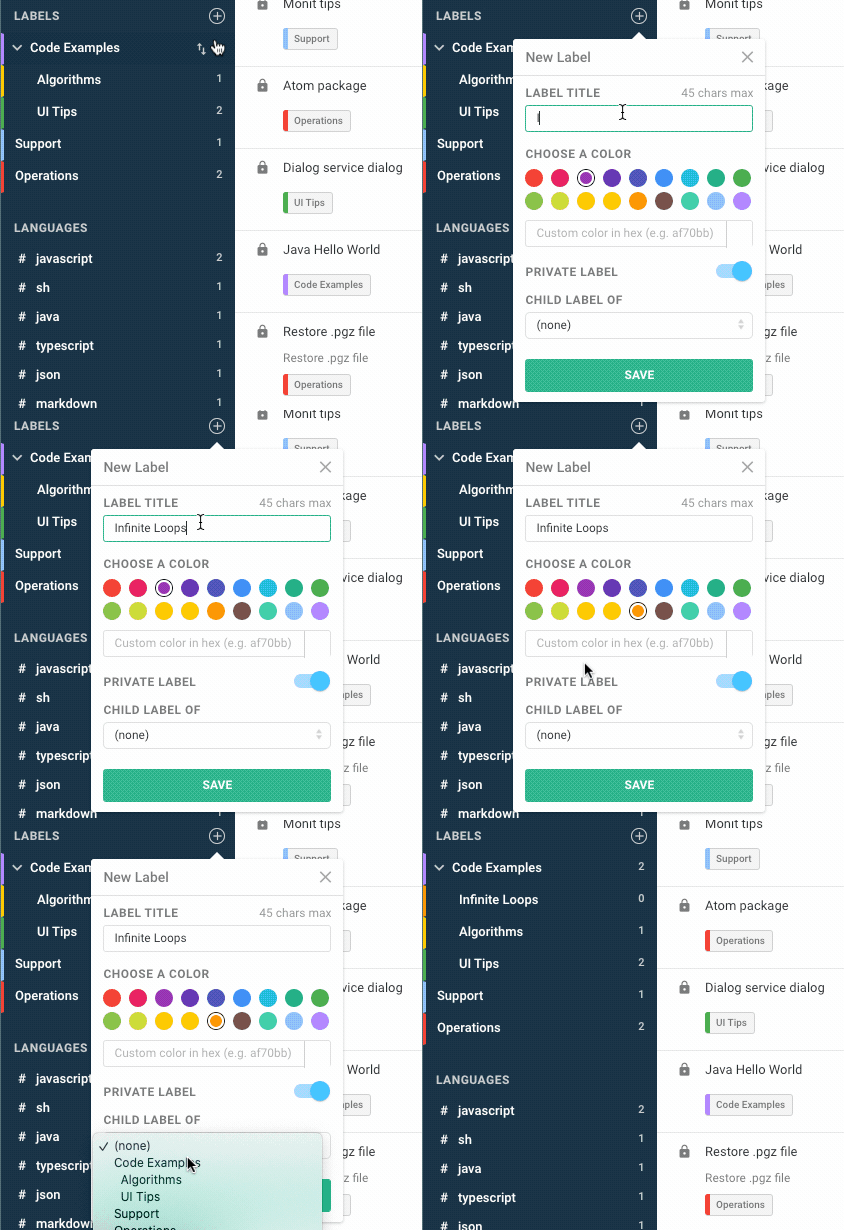
- In the left-hand sidebar, click the add_circle_outline button under Labels.
- Enter a Label Title.
- Pick one of the preset colors or enter a hex value to define a custom color.
- Choose whether the label will be Private.
- If you are creating a nested label, select a label for Child Label Of.
- Click Save to create the label.
notes
Note:
Private labels are not indexed by search engines like Google will not be shown to public to Cacher Snippets.
Editing a label

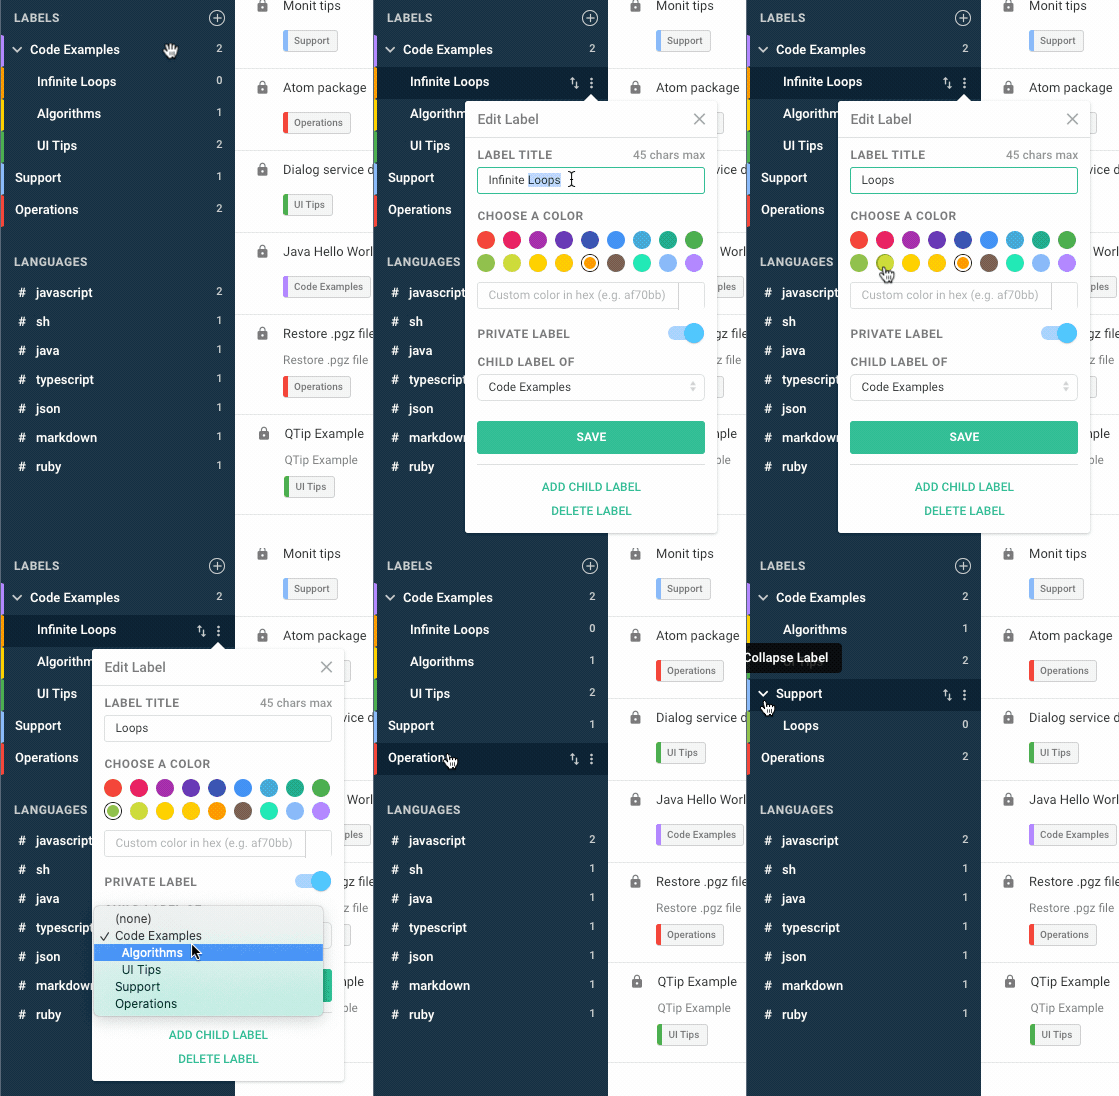
- Hover over a label item in the left-hand sidebar.
- Click the more_vert button to bring up the Edit dialog.
- Change the Label Title, Color or Private toggle.
- To change the parent of the label, select another option for Child Label Of.
- Click Save to save the changes.
Assigning a label to a snippet
Assigning a label to a snippet gives you the ability to easily browse for and find the snippet via search filters. There are 2 ways to assign a label.
Via the Labels dropdown

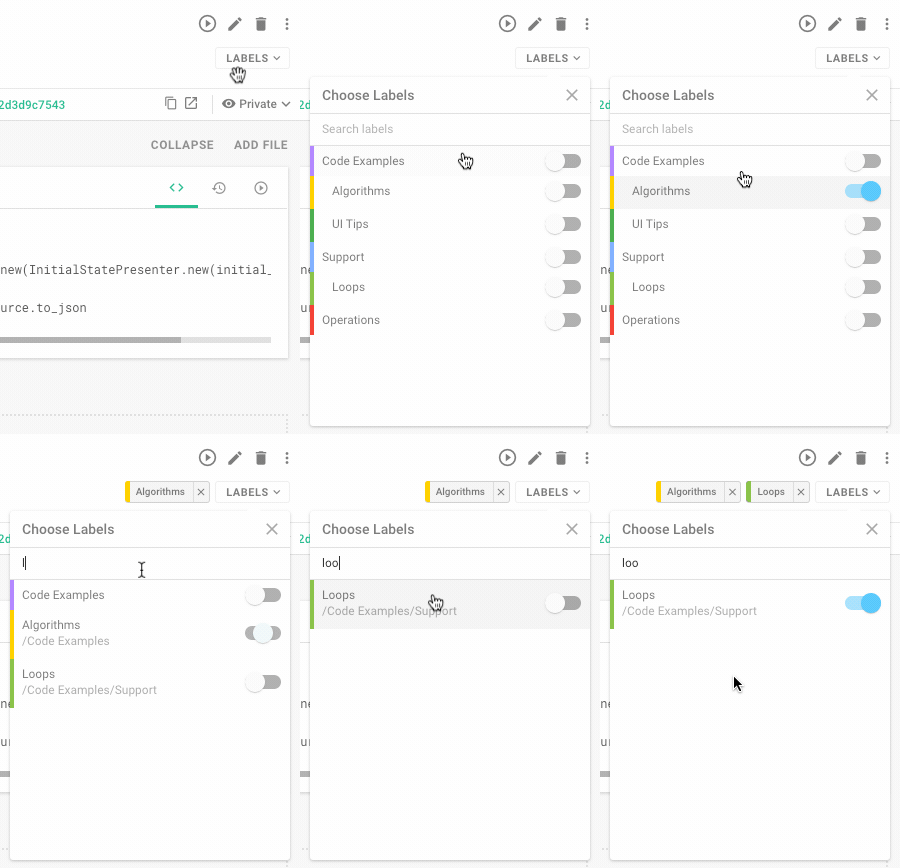
- Click the more_vert button in the top-right corner of a snippet to bring up the Choose Labels dialog.
- Optionally type in a search query to filter down the labels.
- Click the toggle next to a label to assign or de-assign.
Via drag-and-drop

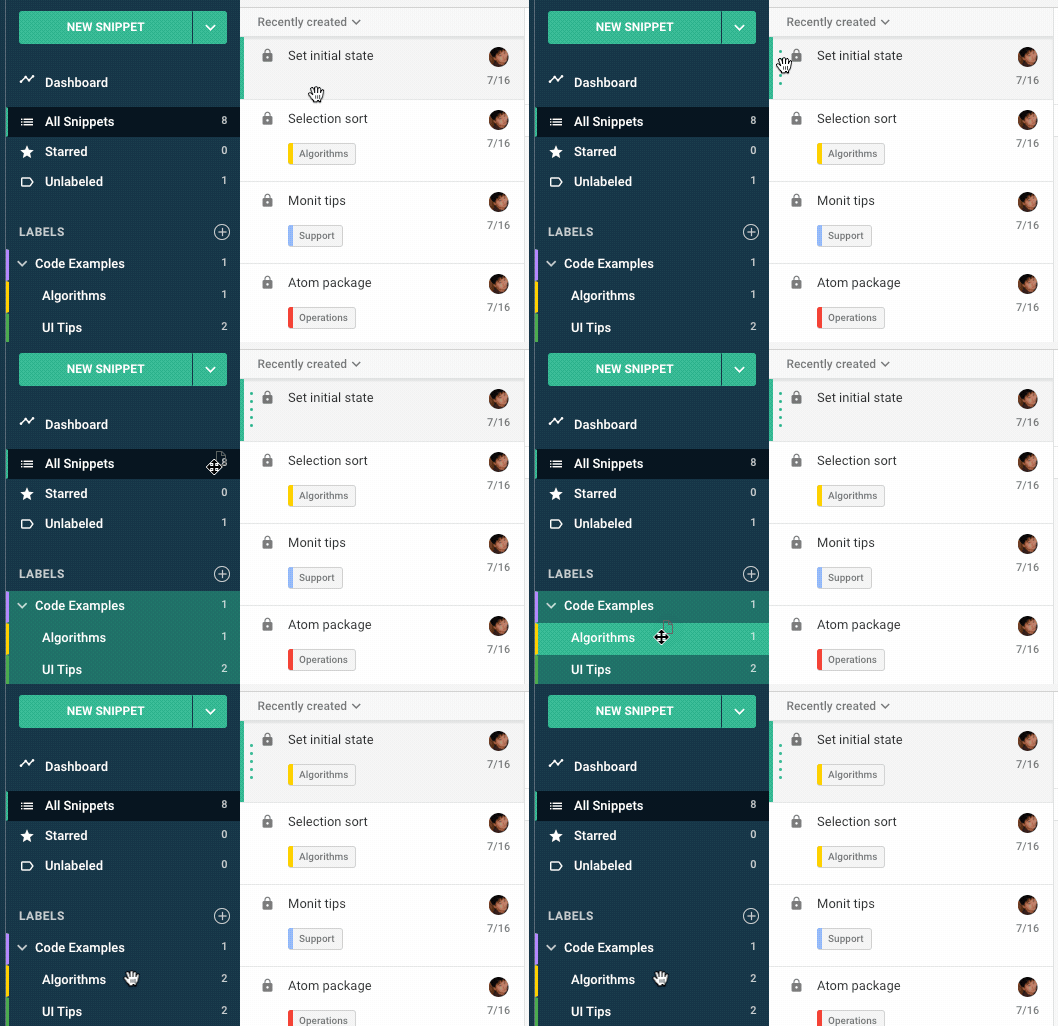
- Hover a snippet in the list.
- Click and hold the grapple hotspot on the left edge of the snippet.
- Drag the snippet the desired label in the left-hand sidebar.
- Drop the snippet onto the label.
- The label should now be assigned to the snippet.


